# Calibration Processes
#### IMU Calibration From The DJI M3D/T Transmitter
Regardless of whether the DJI M3D/T flight transmitter or DJI FlightHub 2 is used as the control method, the configuration menu contains two additional options not described above, such as calibration and parachute packing date. The parachute packing date option (**only available for firmware version 3.6.4 or later**) allows the user to see when their parachute is due to be re-packed (see the "[Parachute Pod Deployment Procedures](https://avss.gitbook.io/prs-m3dt-for-dji-dock2/prs-m3dt-for-dji-m3d-and-m3td/parachute-pod-tm-deployment-procedures)" section for further information on re-packing timelines). The calibration option (**available for all firmware versions**) is used to recalibrate the inertial measurement unit
{% hint style="danger" %}
If the PRS requires frequent recalibration, contact AVSS immediately.
{% endhint %}
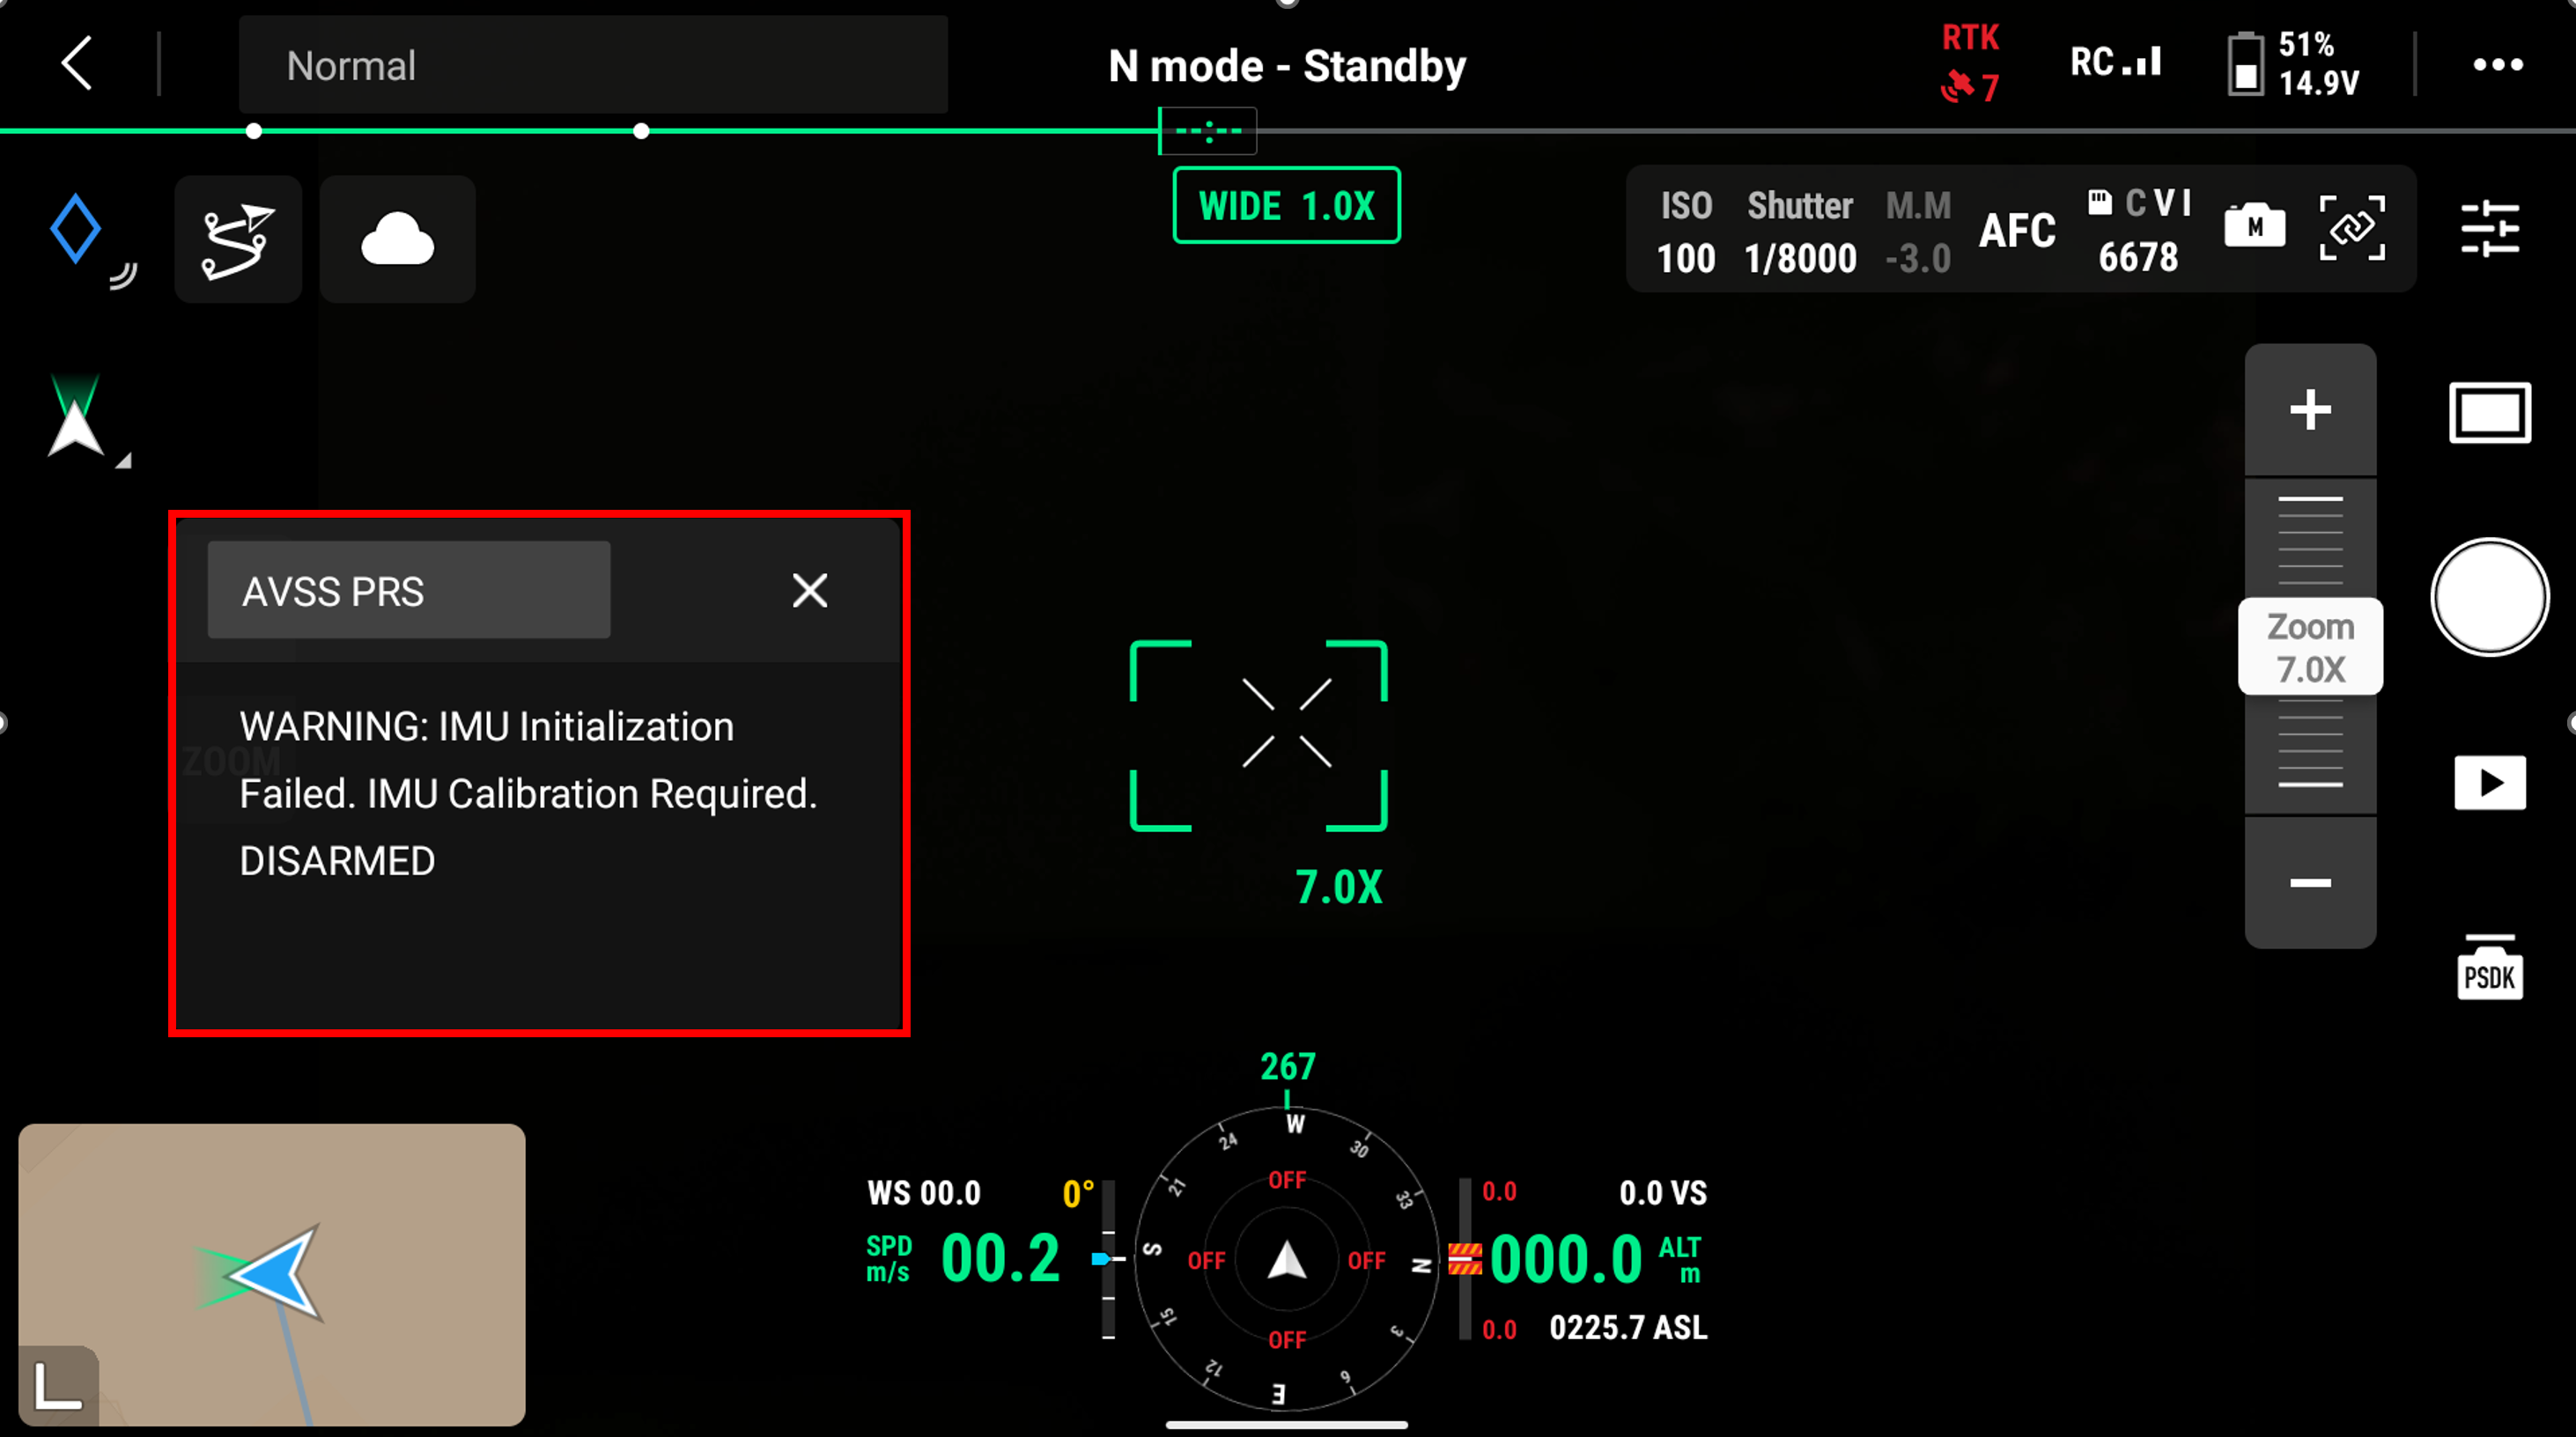
In the event an IMU calibration is required, the following message will become visible on the main screen of the DJI M3D/T flight transmitter or of DJI FlightHub 2. This is also indicated on the PRS-M3DT itself by the status LED, which will flash yellow (see chart at top of "[Status Indications](https://avss.gitbook.io/prs-m3dt-for-dji-dock2/prs-m3dt-for-dji-m3d-and-m3td/status-indications-remote-controller-flighthub-2)" section).
Calibration Warning for PRS-M3DT IMU
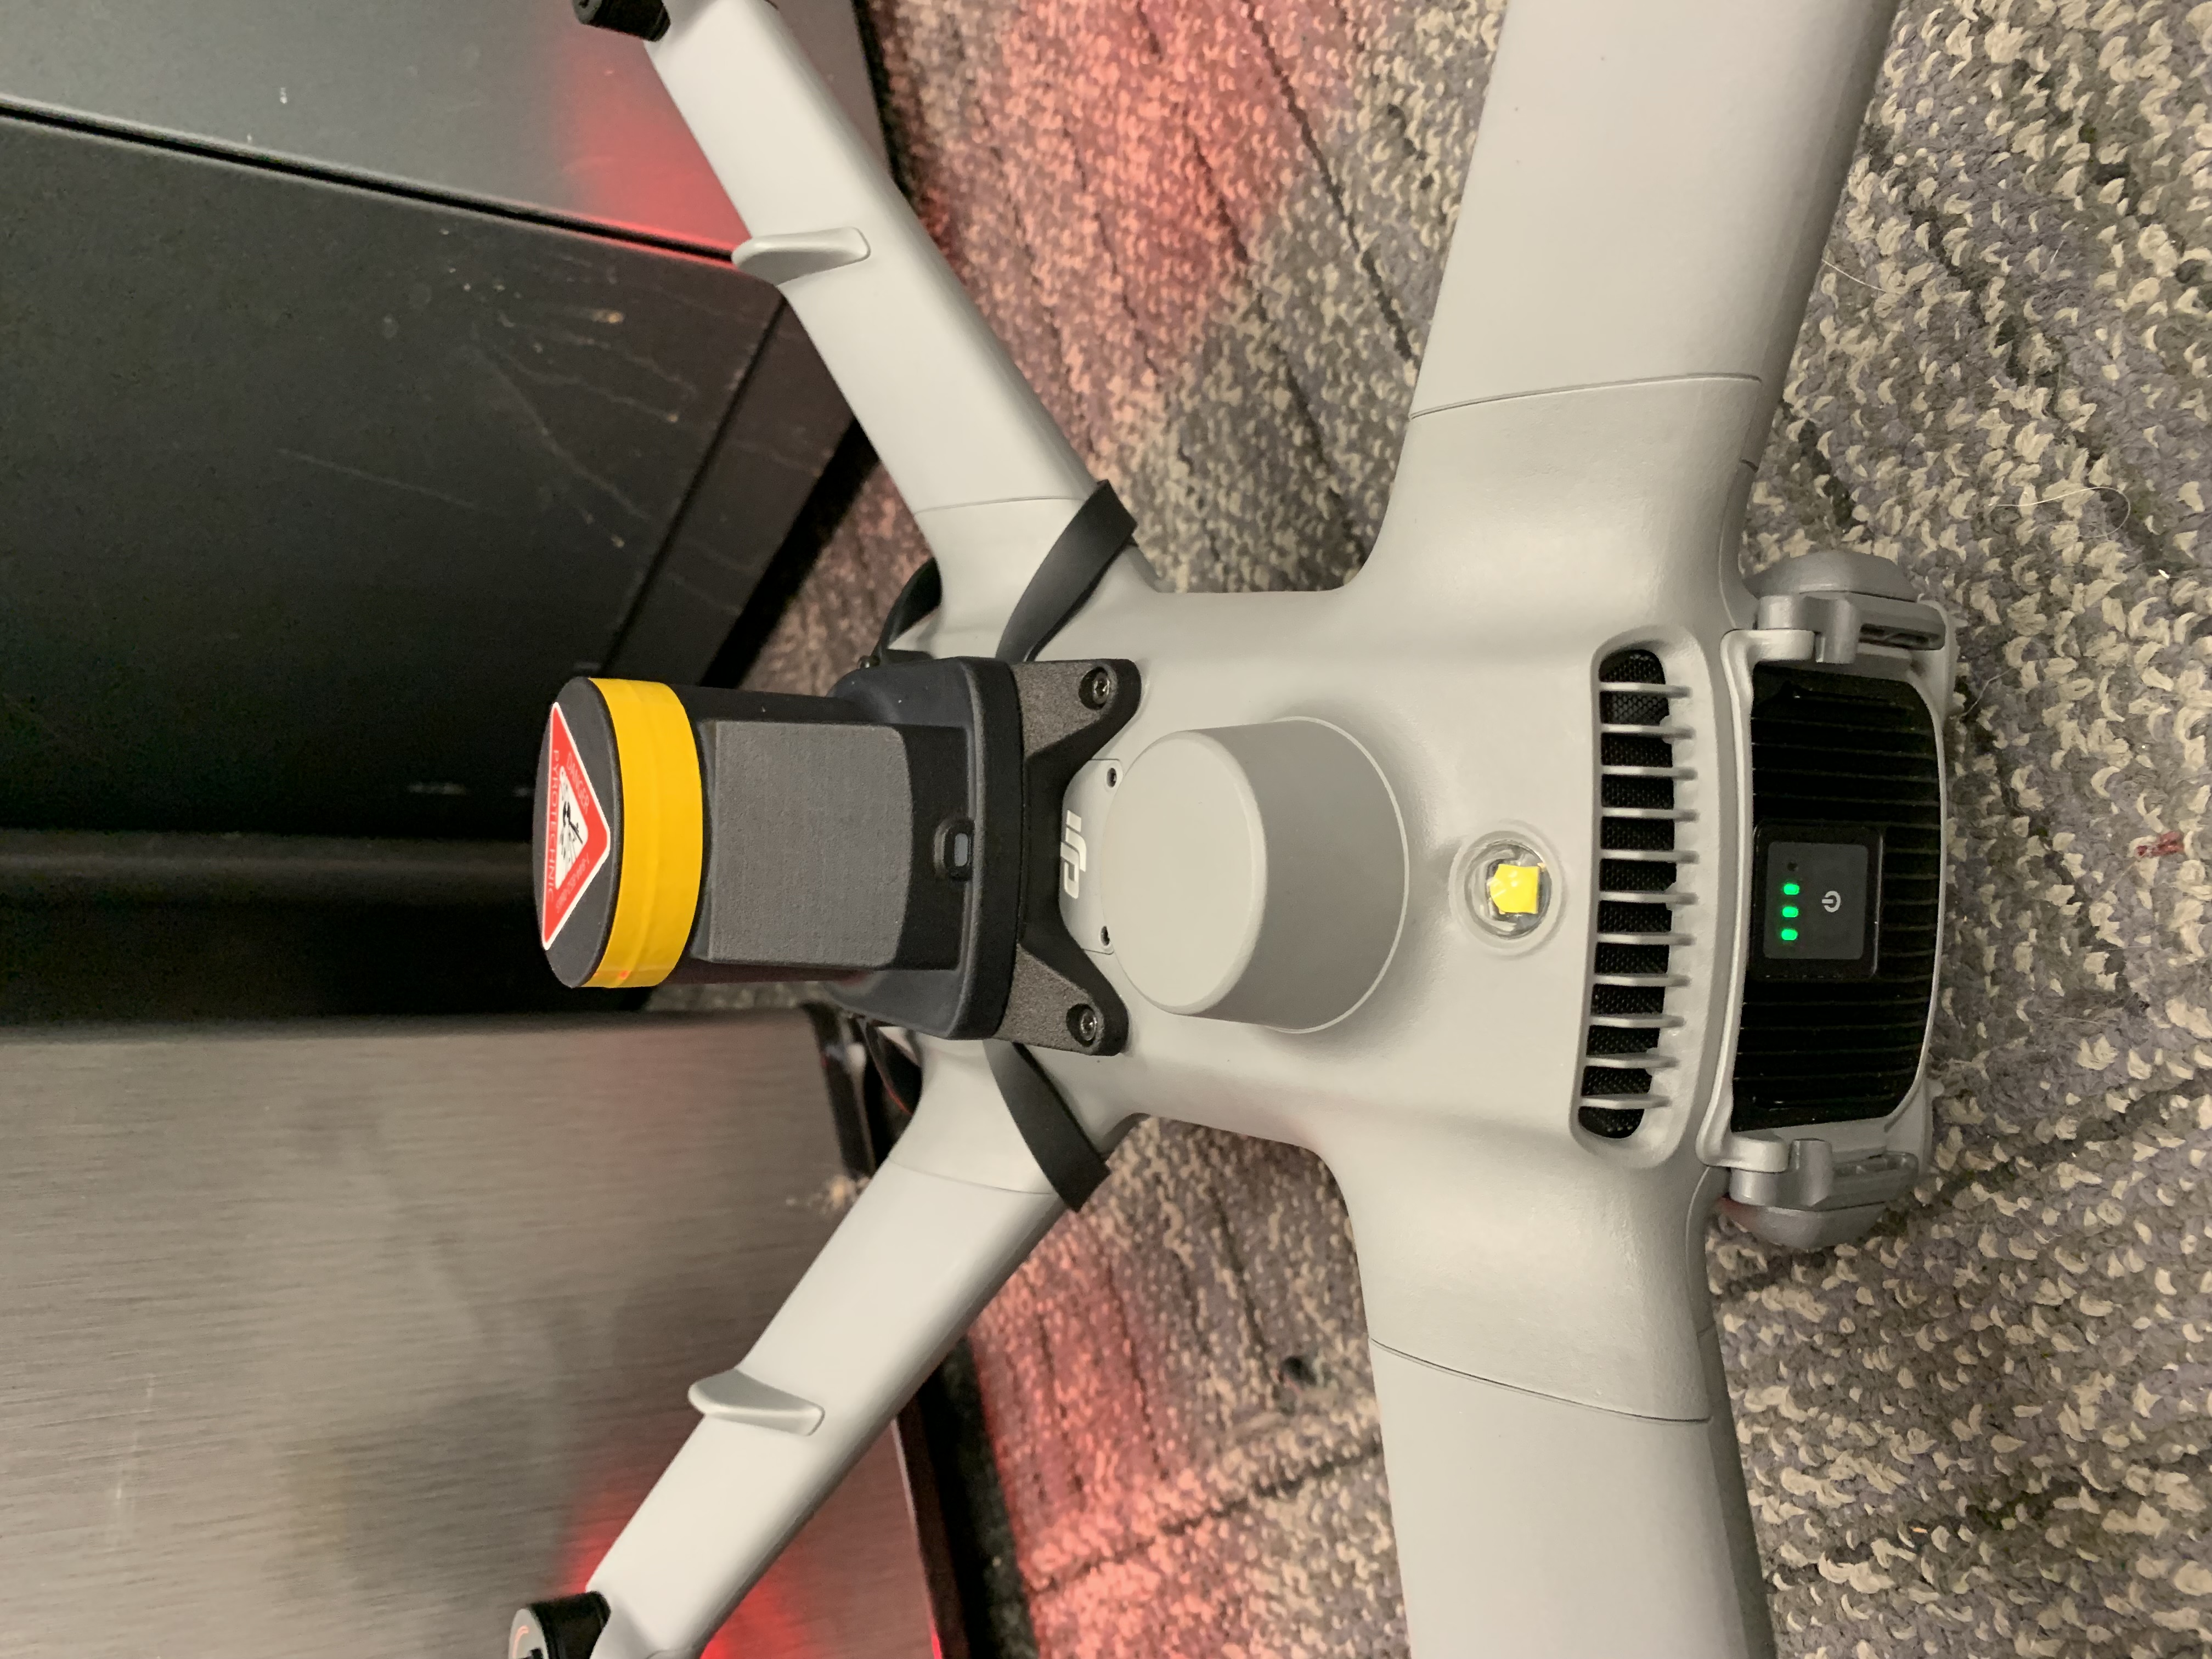
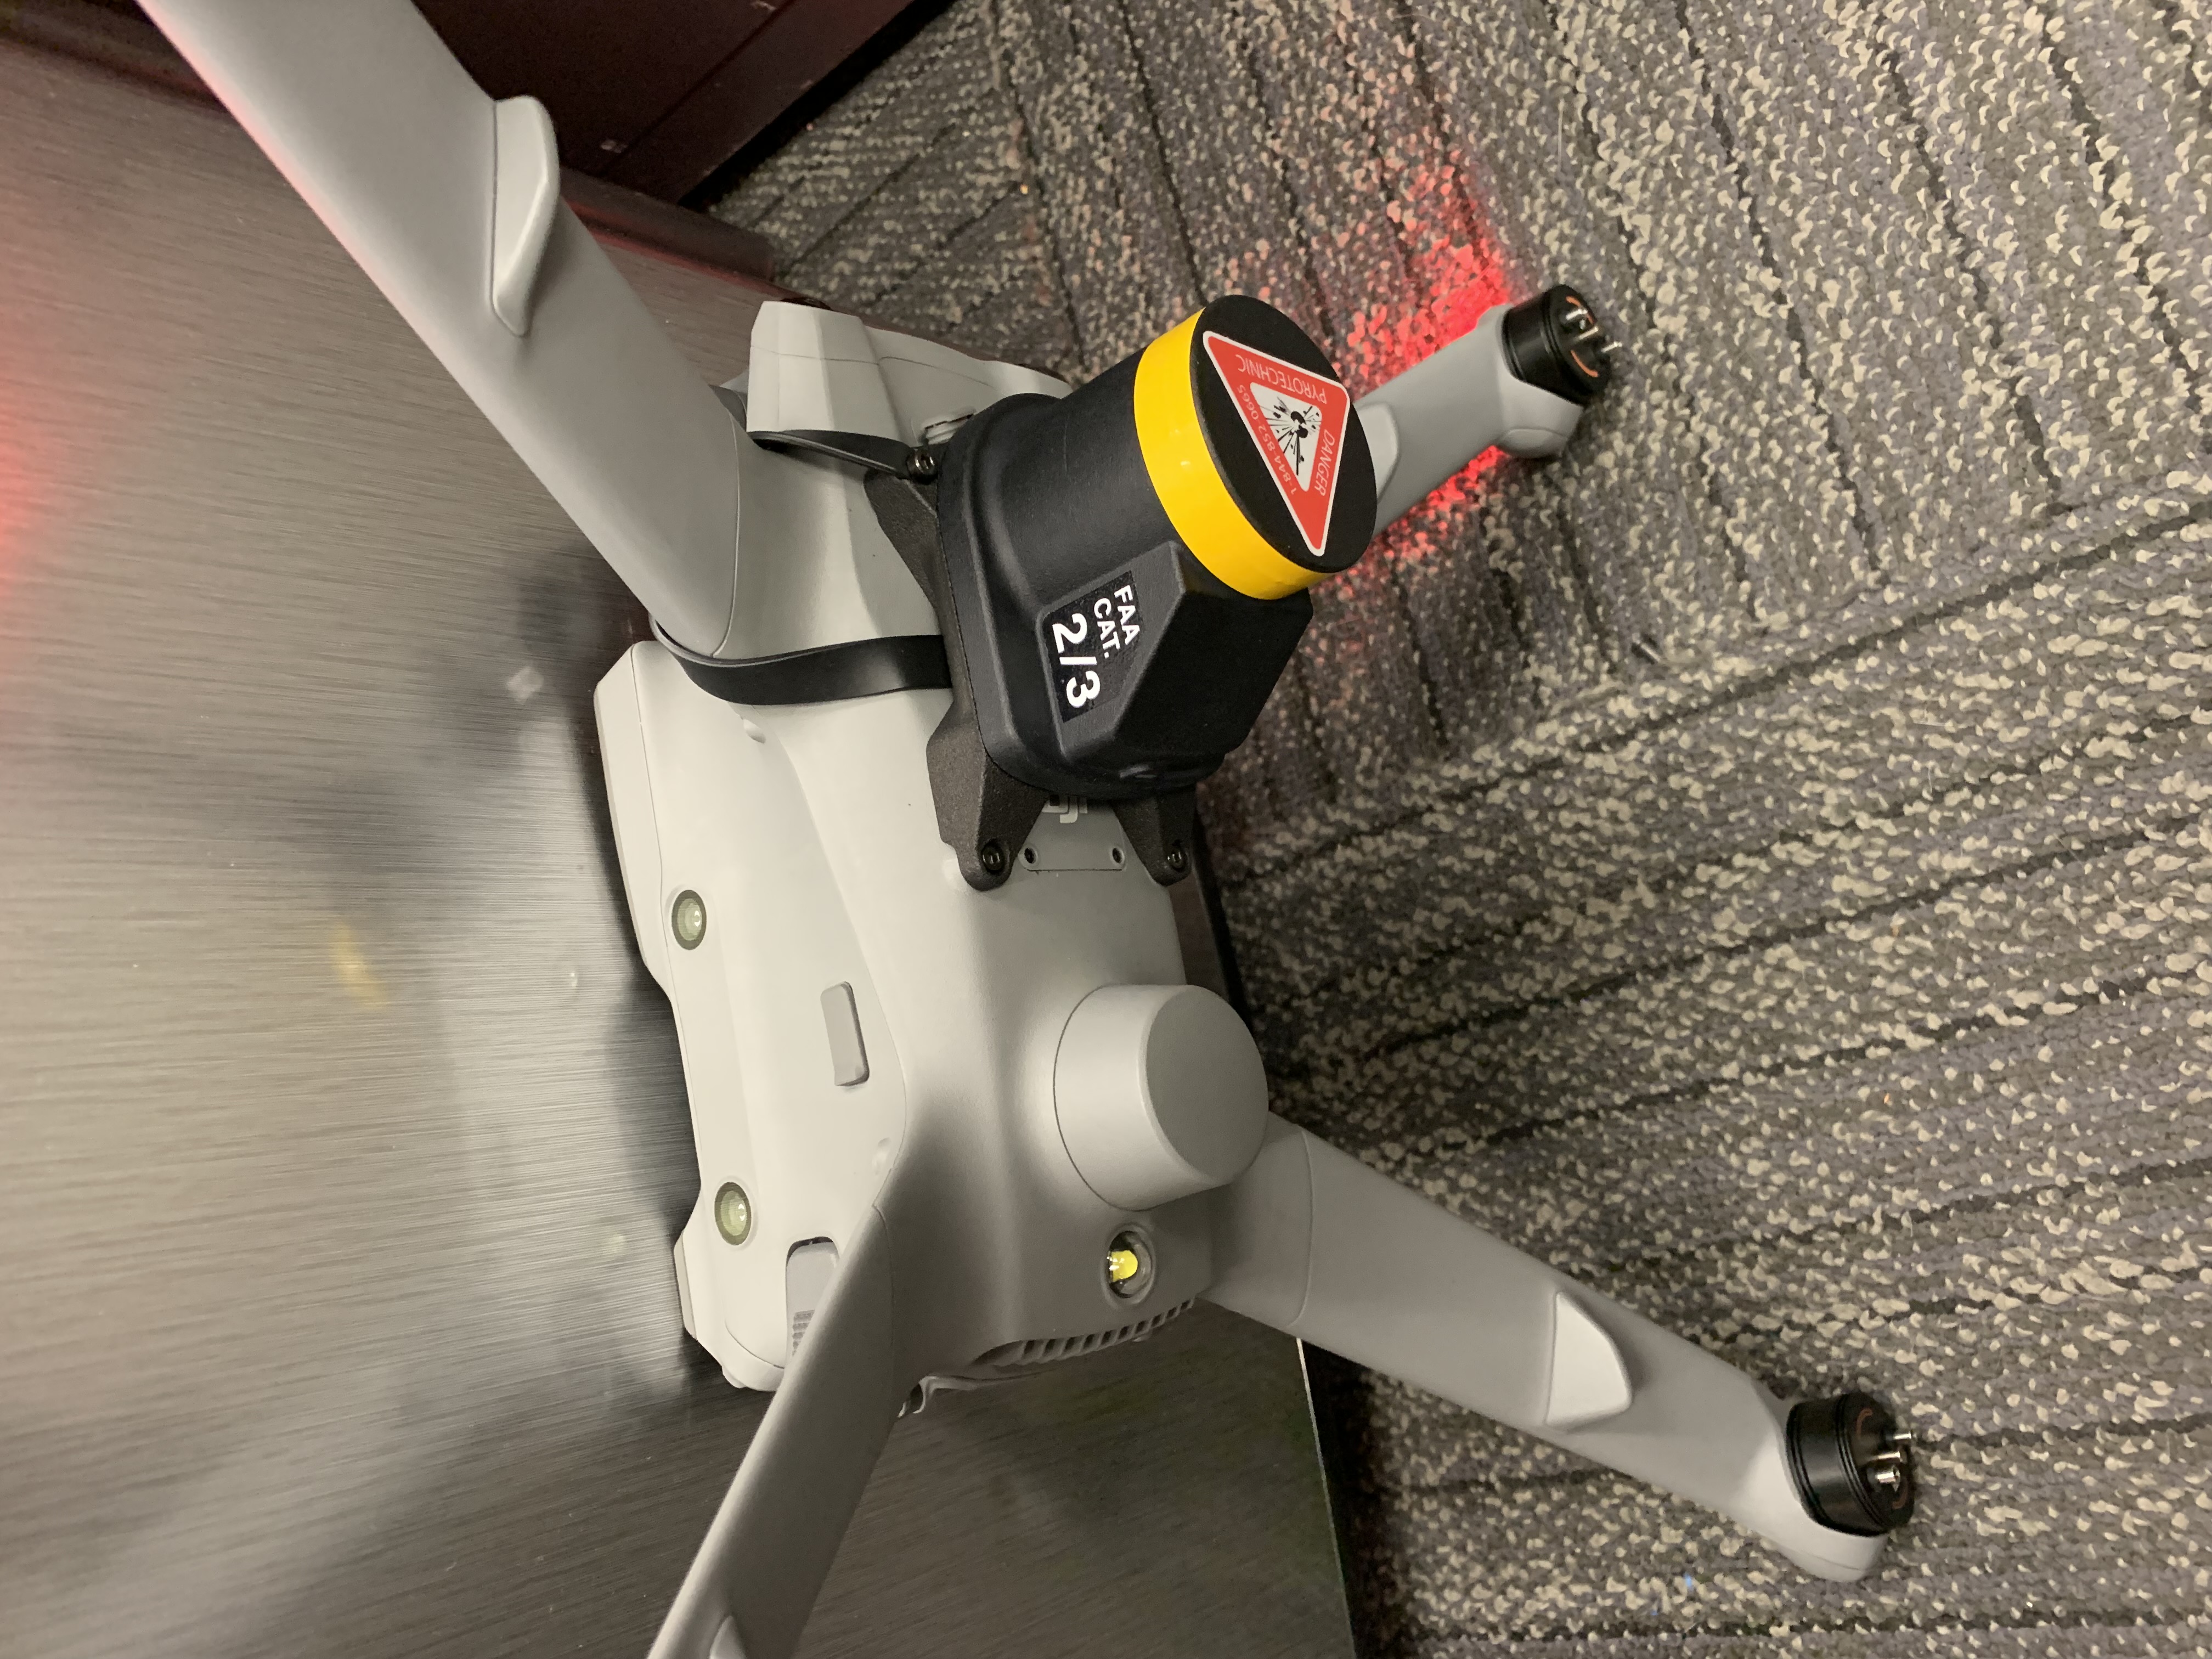
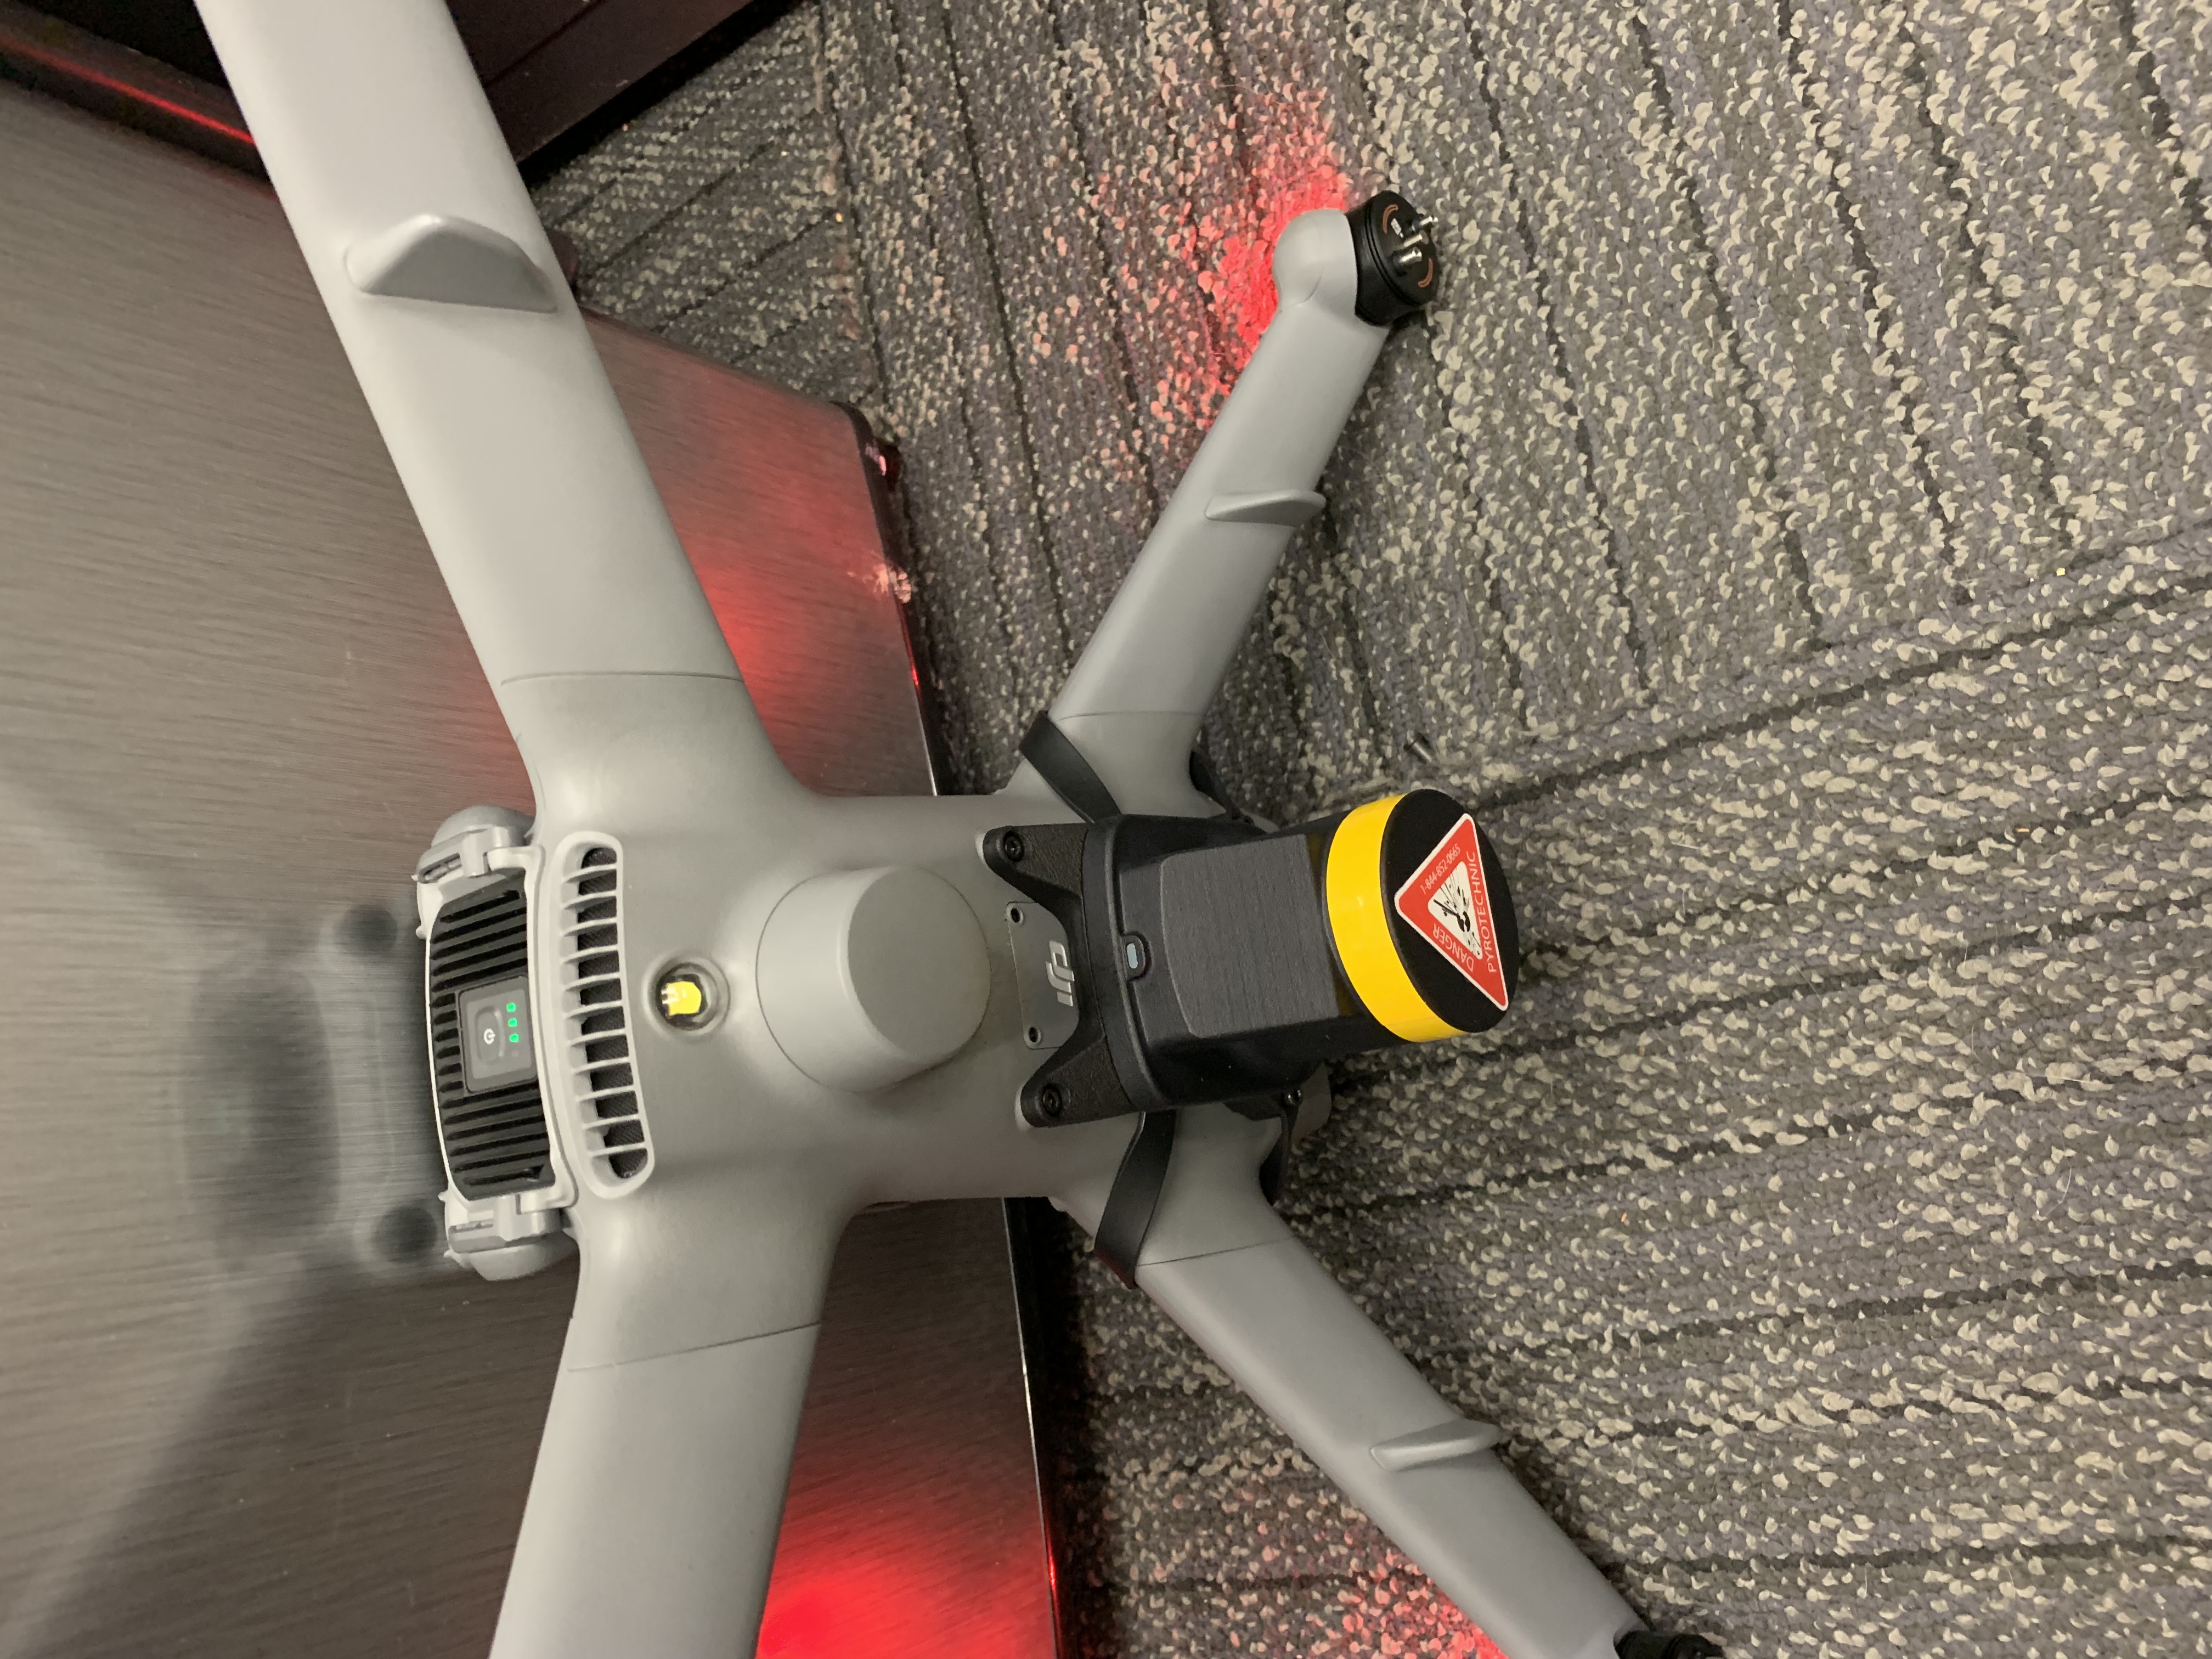
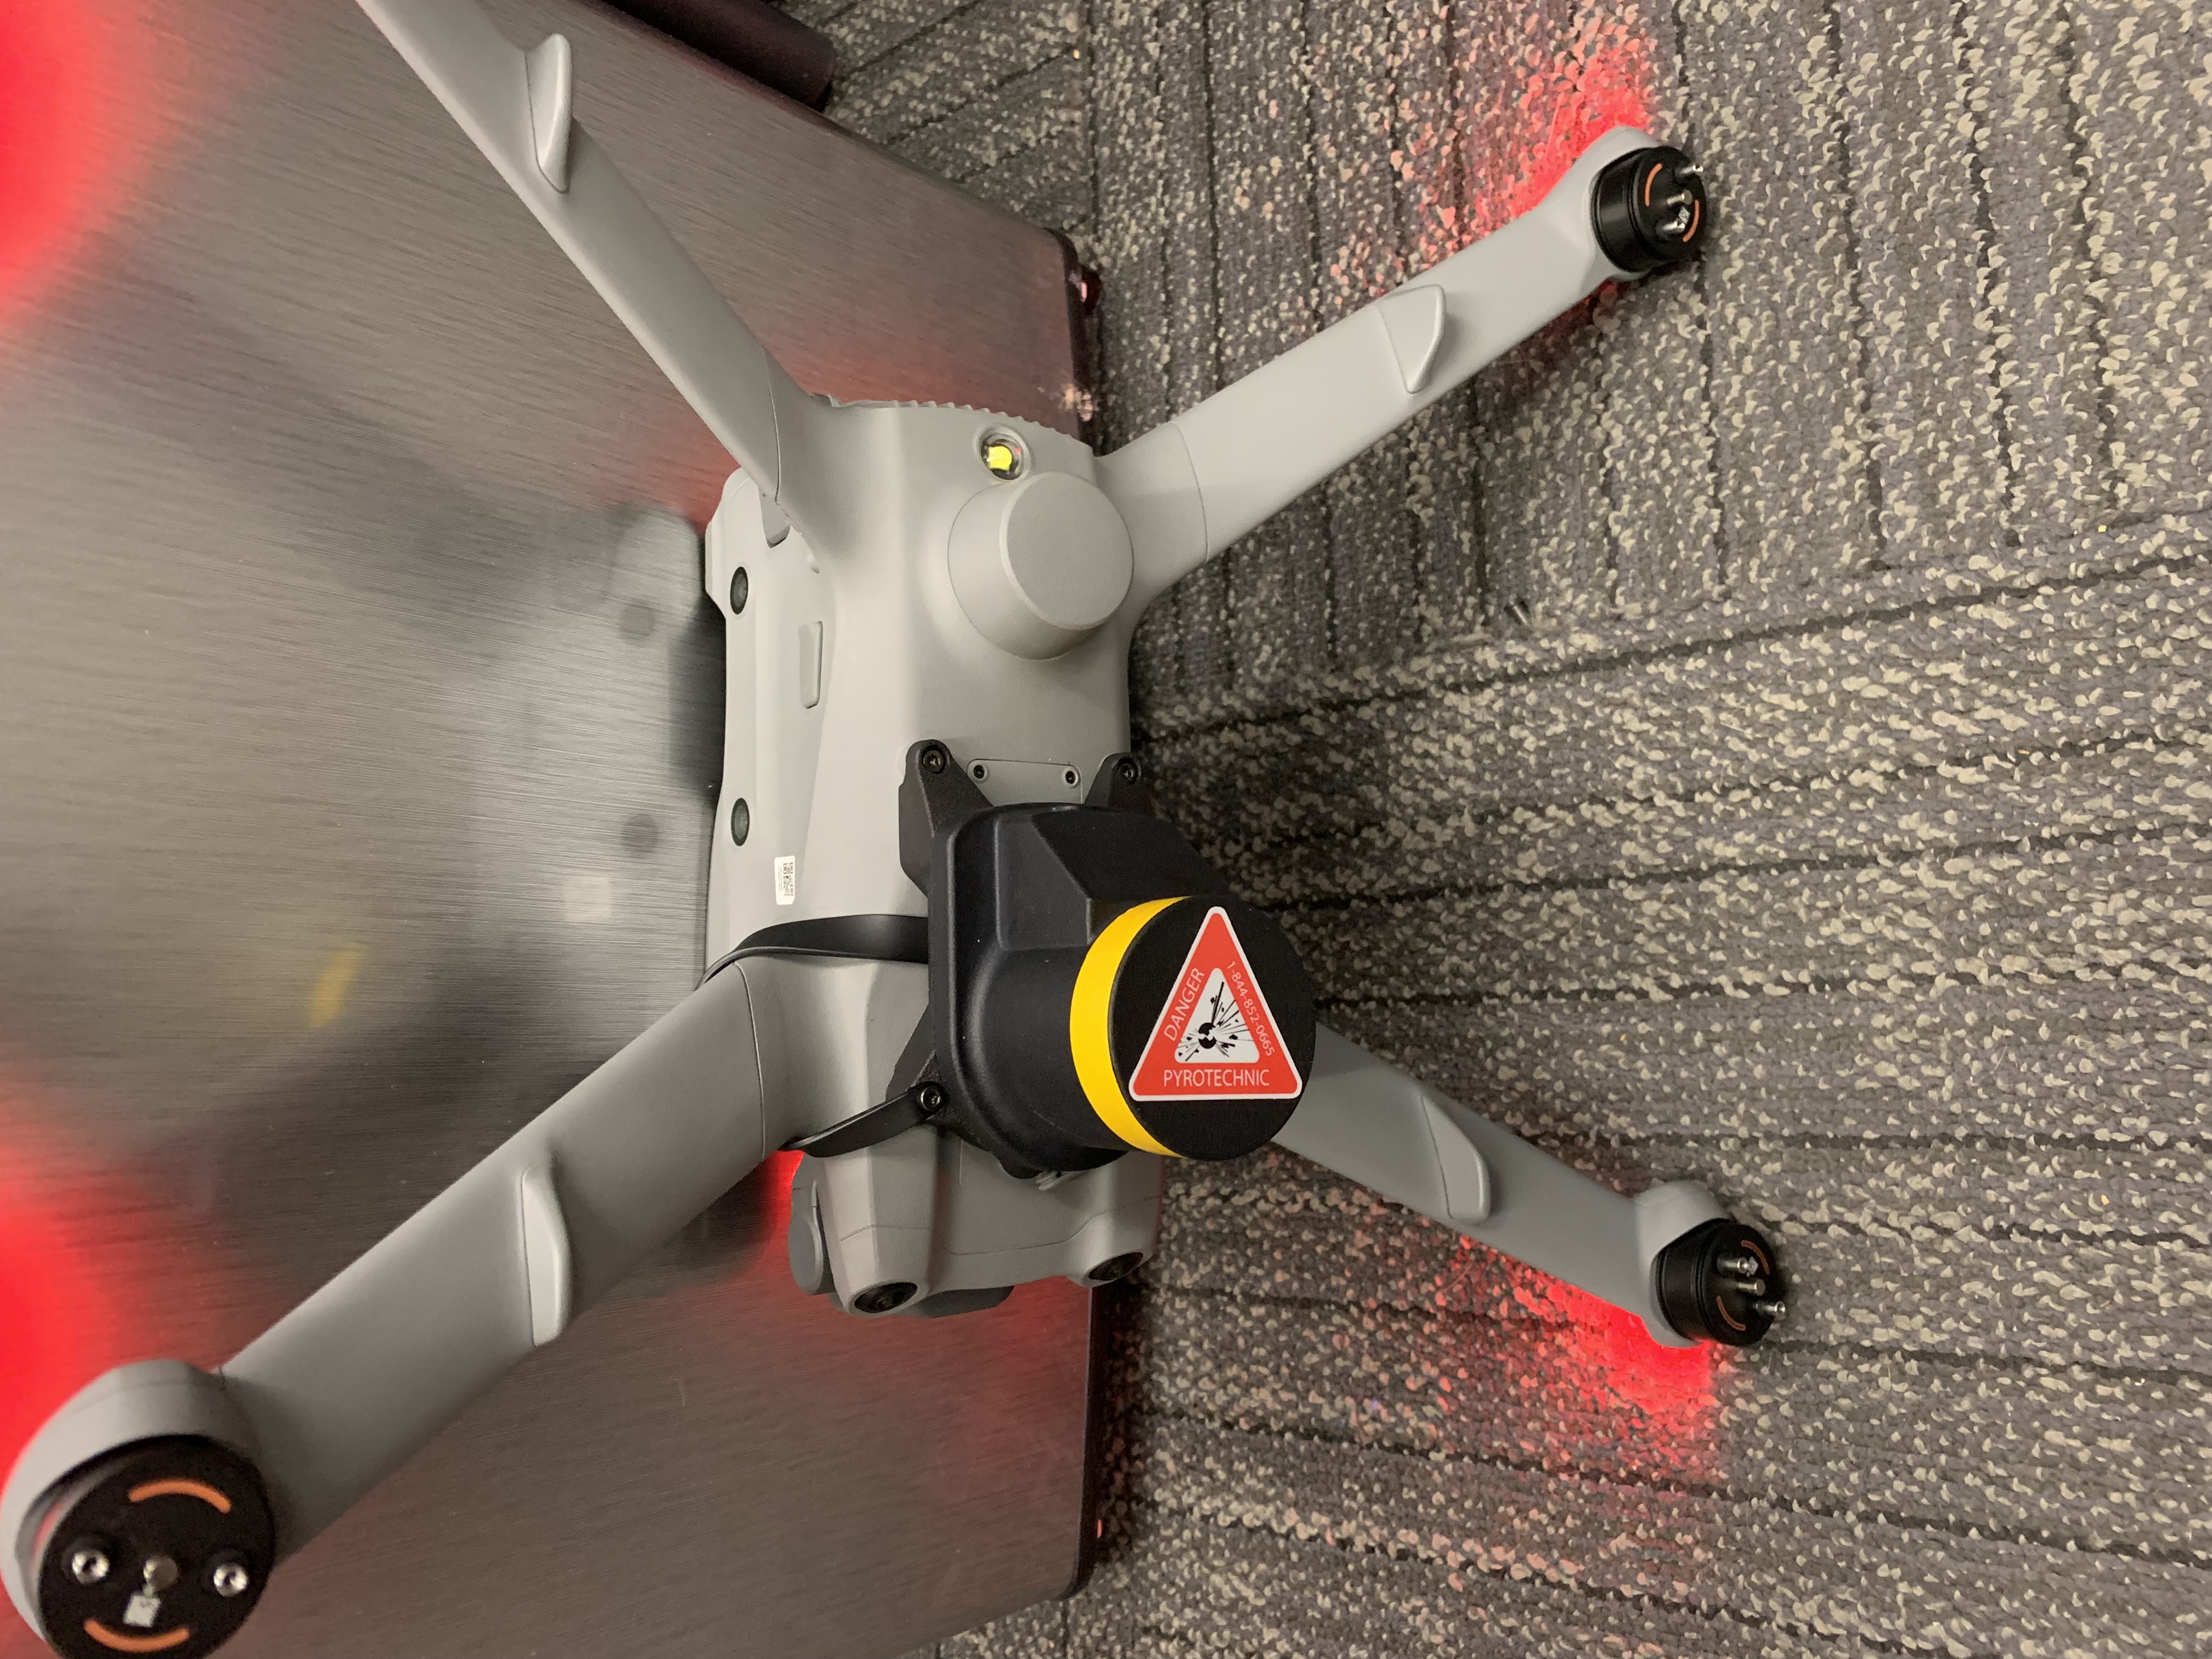
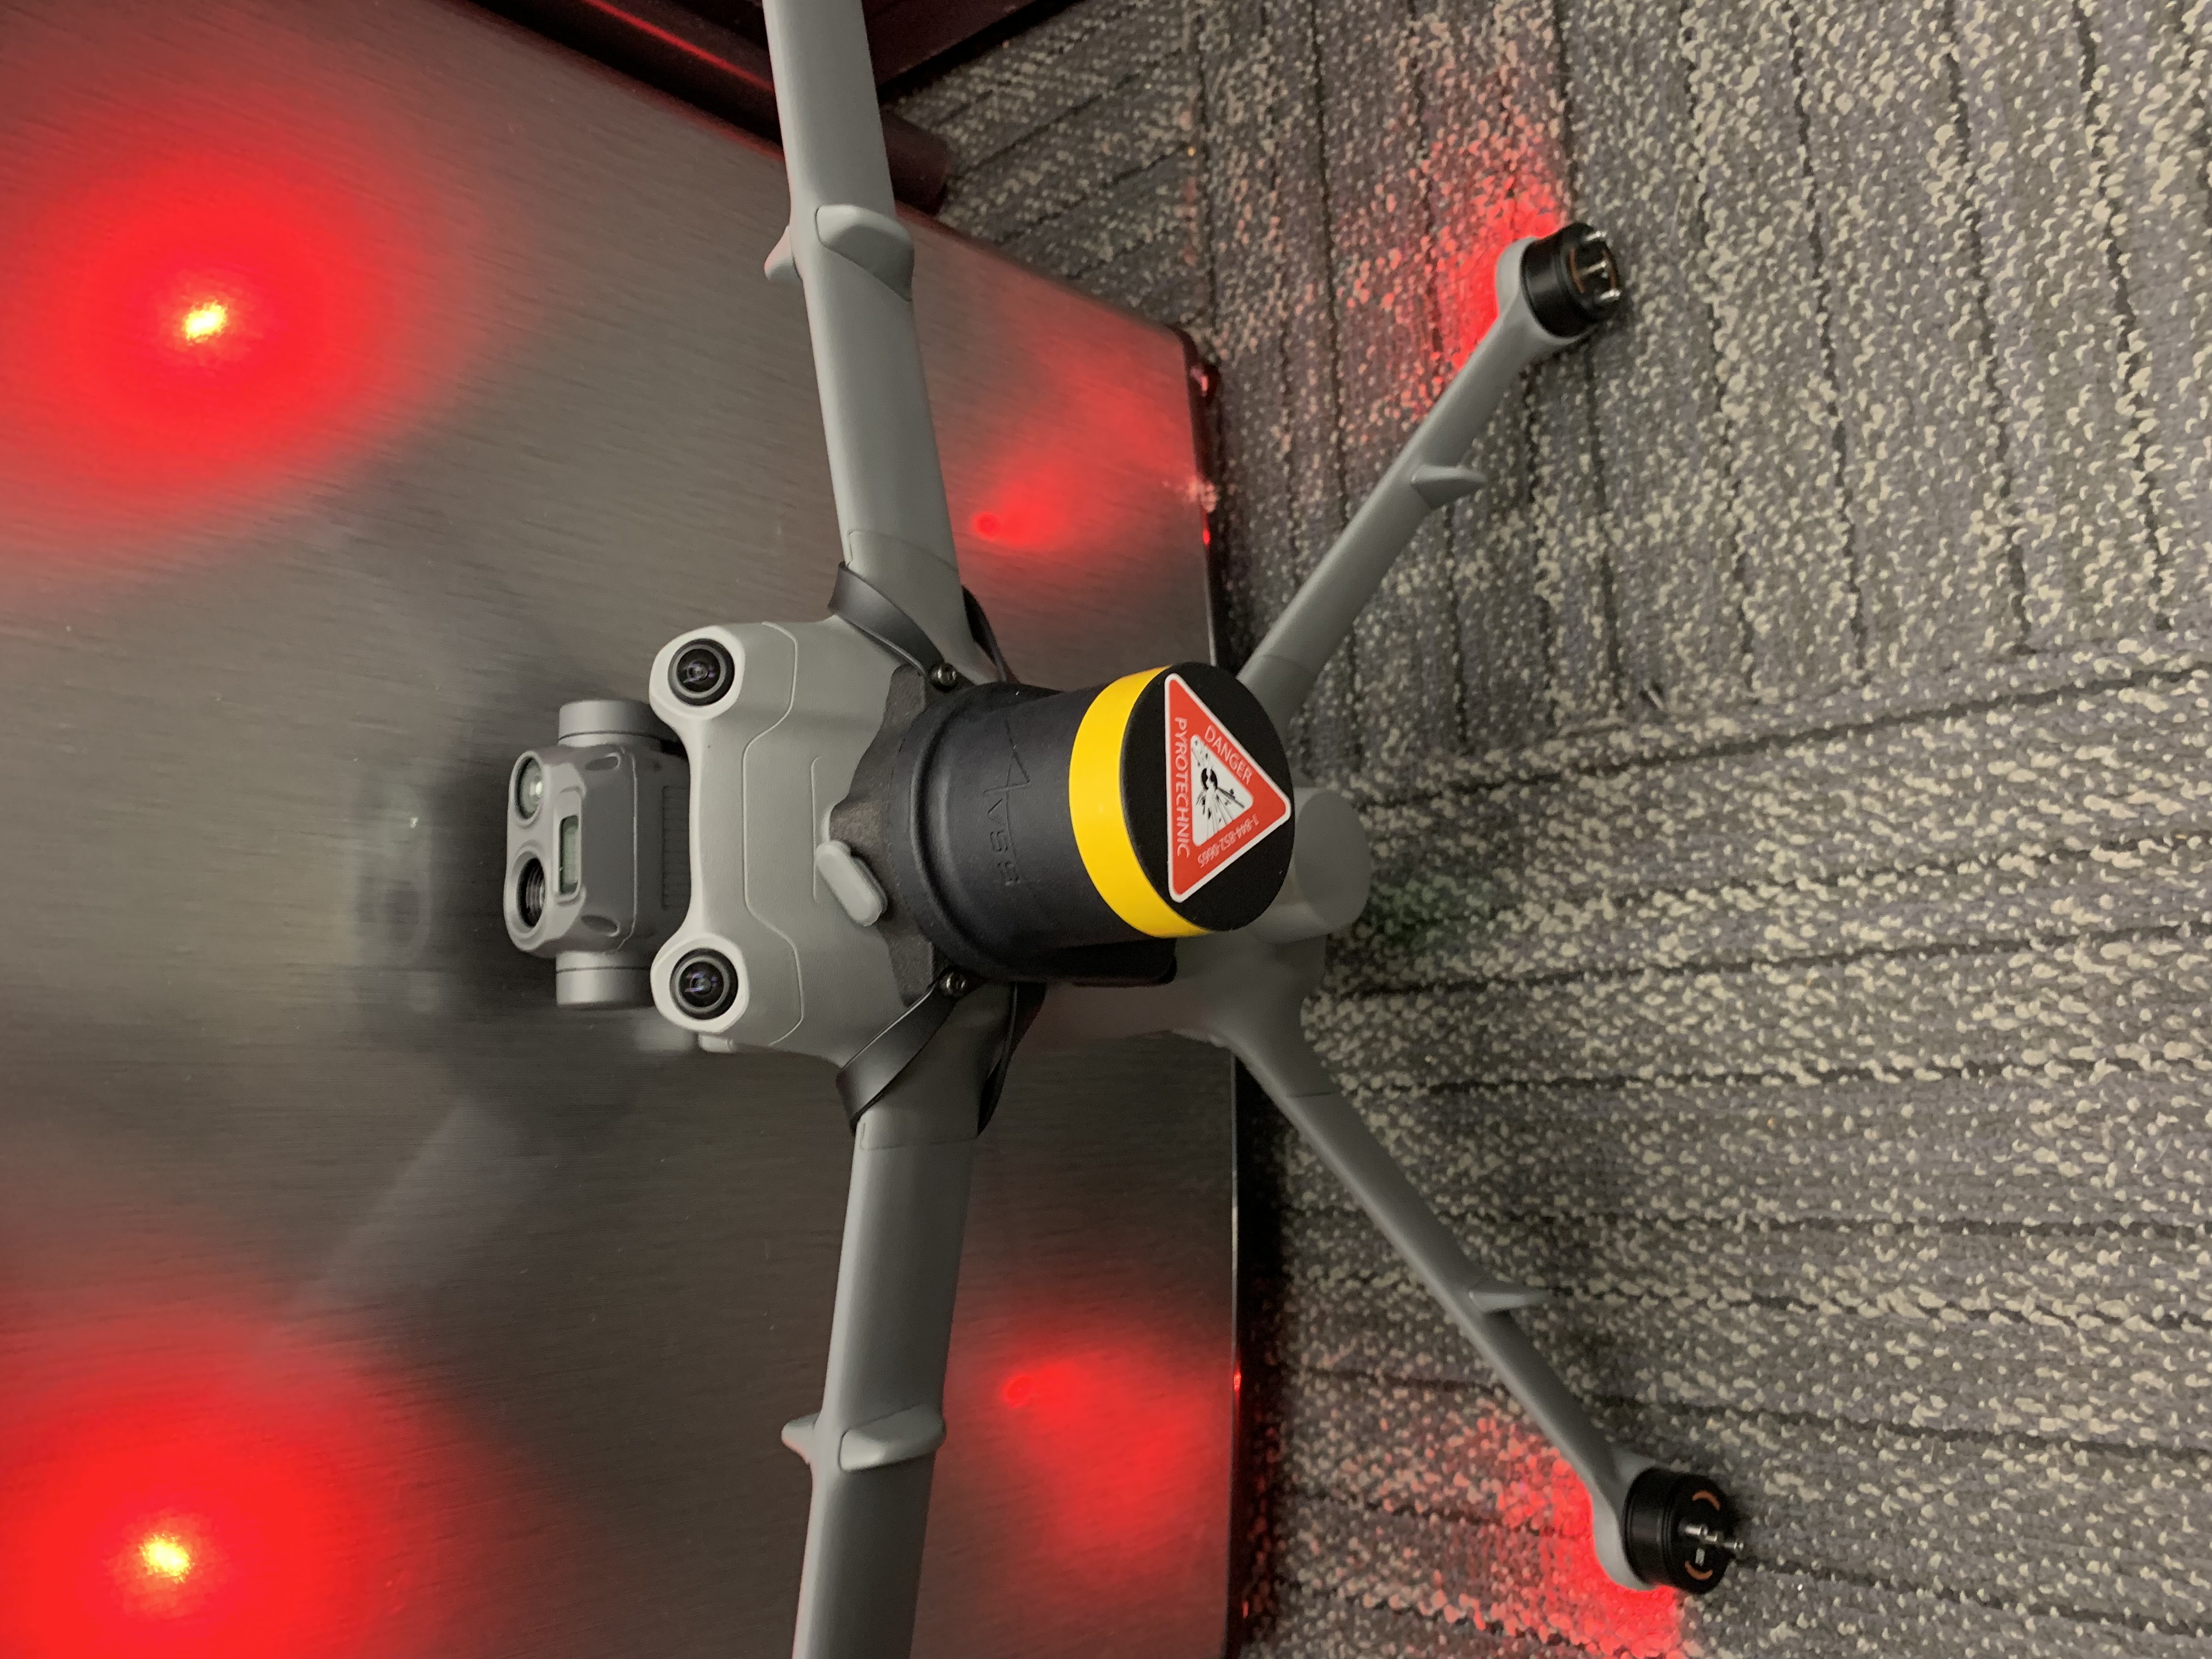
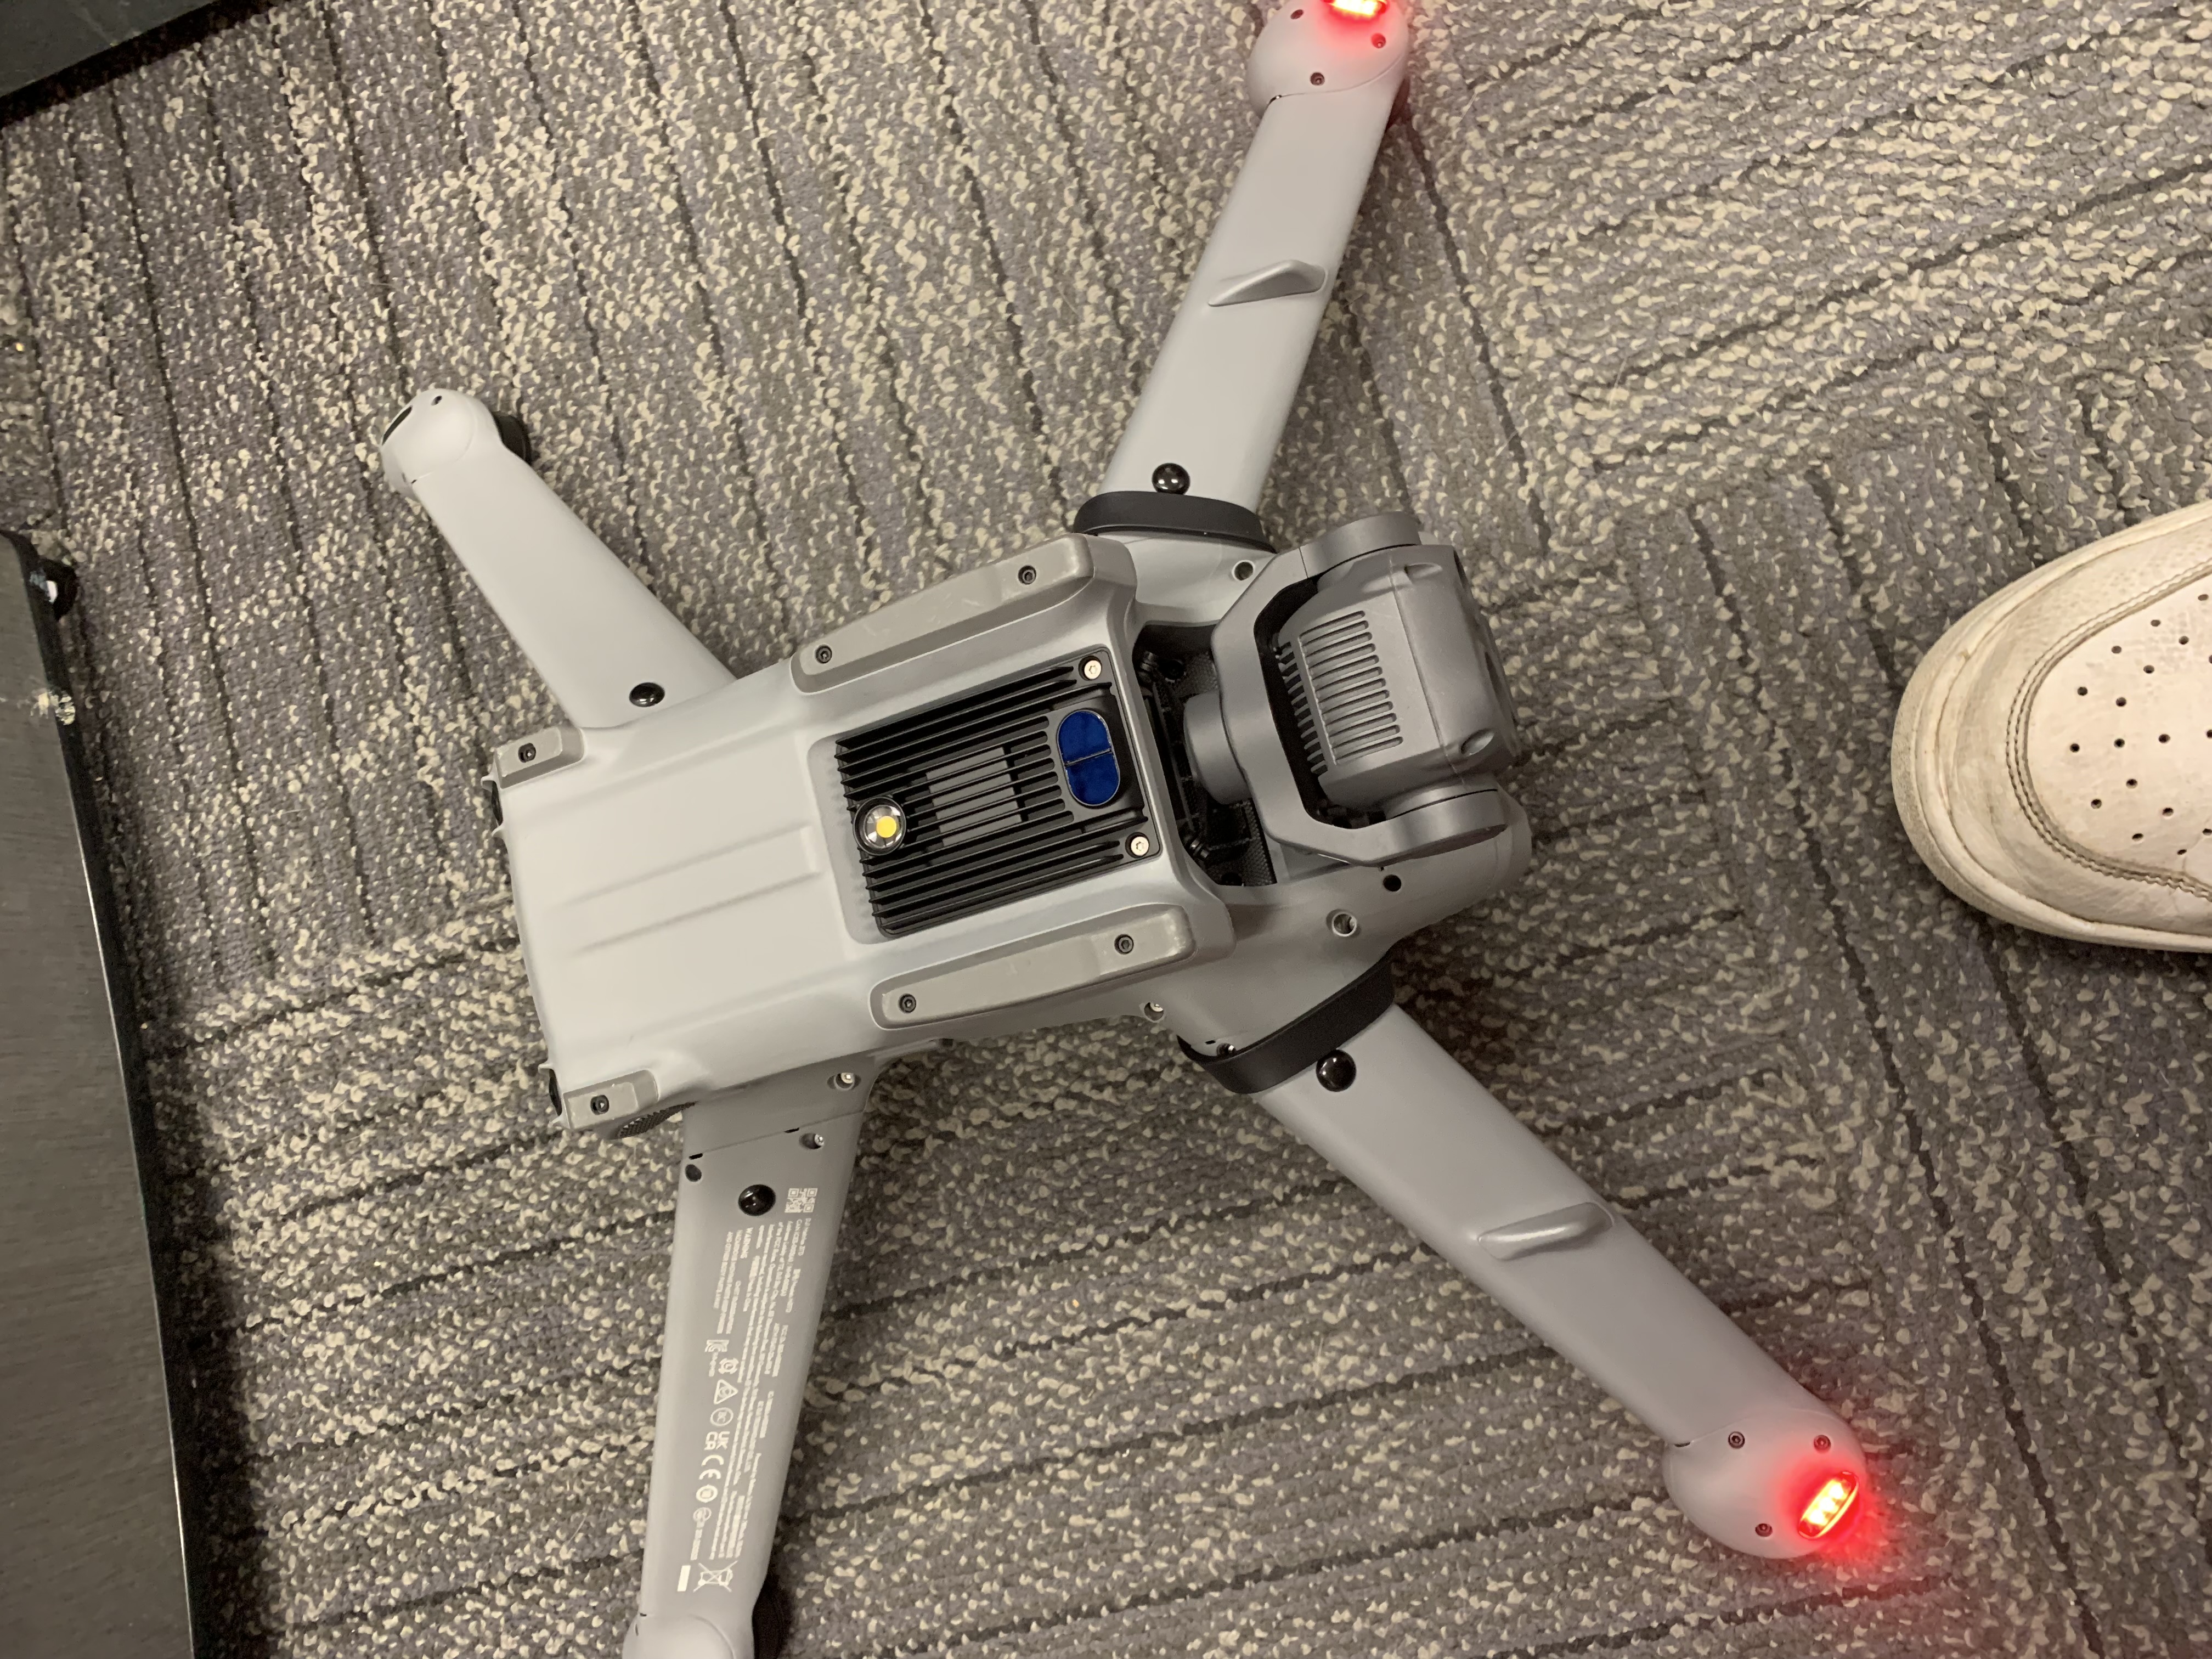
To properly calibrate the IMU, the PRS-M3DT must be rotated through the six physical orientations, with a minimum of five (5) seconds spent in each orientation. The PRS must be kept steady during each five (5) second interval. Note that this actually results in seven (7) changes in orientation. The easiest way to accomplish this is simply to rotate the DJI M3D/T through each orientation with the PRS-M3DT attached, as shown below.
{% hint style="danger" %}
PRIOR TO ROTATING THE DJI M3D/T, CHECK THAT THE PRS-M3DT IS DISARMED BY ENSURING THAT THE PRS STATUS MESSAGE OUTLINED ABOVE READS "DISARMED".
{% endhint %}
After an additional thirty (30) seconds, a successful calibration will be signaled by the disappearance of the calibration warning from the main screen of either the DJI M3D/T transmitter or DJI FlightHub 2. The LED status light will also change to green to indicate normal operations. If a successful calibration is not indicated, restart the DJI M3D/T to connect the PRS-M3DT with the DJI-M3D/T.
#### Compass Calibration From the DJI M3D/T Transmitter
Independently, the DJI M3D/T may prompt a user that the onboard compass needs to be calibrated. In this case, a user shall simply follow the instructions displayed either on the DJI M3D/T transmitter screen or in FlightHub 2. It is recommended that while calibrating the compass, the PRS-M3DT be attached to the DJI M3D/T to avoid changes to the DJI M3D/T's magnetic field readings.
{% hint style="danger" %}
WHEN CALIBRATING THE DRONE COMPASS WITH THE PRS-M3DT ATTACHED, ENSURE THAT THE DRONE AND PRS GET A FRESH REBOOT BY FIRST POWERING OFF THE DRONE AND ENSURING THE PRS IS OFF, THEN POWERING ON THE DRONE AND ENSURING THE PRS IS TURNED ON. VERIFY THAT THE PRS-M3DT IS DISARMED BY CHECKING THE PRS STATUS MESSAGE WINDOW FOR THE "DISARMED" MESSAGE.
{% endhint %}
#### IMU Calibration From AVSS Assistant
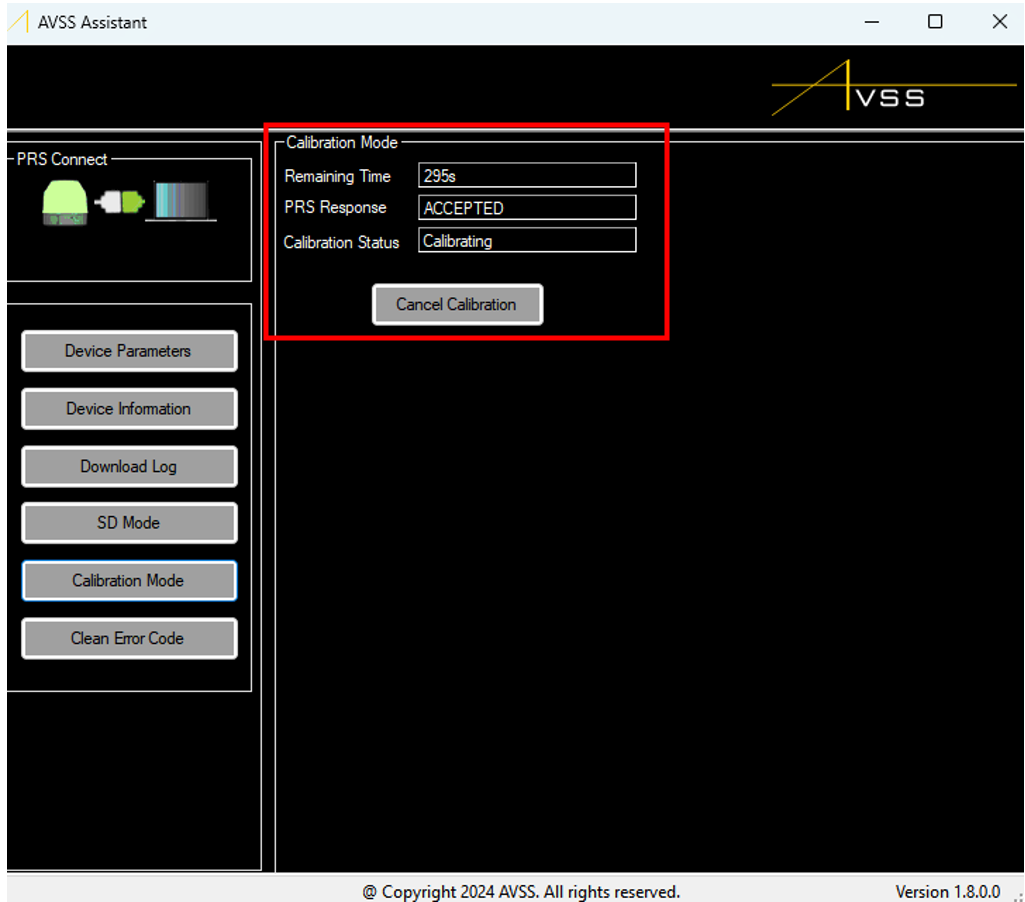
It is also possible to calibrate the PRS-M3DT's IMU by using the "Calibrate Mode" function in AVSS Assistant. To access this feature, click on the “Calibration Mode” button to calibrate the PRS’s sensors. Note that if using this option, there is a 300-second time window to complete the calibration maneuver; otherwise, the calibration is automatically cancelled. Please follow the orientation instructions above.
IMU Calibration Option (AVSS Assistant)
As with conducting a calibration from the DJI M3D/T transmitter, imagine the PRS-M3DT as being inside of a 3D cube and place the PRS-M3DT on every 6 faces of this cube. Keep the PRS-M3DT stationary for 10 seconds on every face. In the end, return the PRS to its initial orientation and wait 10 seconds. If the calibration is successful, the PRS-M3DT will restart. If a successful calibration is not indicated, unplug the PRS from the computer, wait until the PRS turns off, then reconnect the PRS back into the computer and attempt the calibration again.