Installation
Ensure that the PRS-M3DTEX is off before attaching and/or disconnecting the PRS-M3DTEX from the DJI M3D/T

NOTE: STEP 1 OF THE BELOW INSTRUCTIONS MUST BE REPEATED FOR ALL SUBSEQUENT INSTALLATIONS OR AFTER A RE-PACK IS CONDUCTED.
DO NOT ATTACH THE PRS-M3DTEX SLEEVE AND DJI M3D/T BATTERY TOGETHER PRIOR TO INSERTING THE PRS-M3DTEX SLEEVE INTO THE DJI M3D/T BATTERY COMPARTMENT.
Attaching the PRS-M3DTEX to the DJI M3D/T Drone
Step 1
Grease the Gasket on the PRS-M3DTEX Sleeve
Open the clips on the PRS-M3DTEX sleeve to access the gasket track. Generously apply a layer of grease on the surface of the gasket while ensuring that the gloves provided are covering your hands.

Step 2
Position the PRS-M3DTEX Sleeve in the Battery Compartment
Slide the greased PRS-M3DTEX sleeve into the battery compartment using light and even pressure until the PRS-M3DTEX sleeve clips can be locked into place.

Step 3
Seal the Clips on the PRS-M3DTEX Sleeve
Gently push the black clips on each side of the PRS-M3DTEX sleeve inward (toward the DJI M3D/T) to secure the PRS-M3DTEX sleeve within the battery compartment. A successful connection will be signaled by a light click.

Step 4
Insert the DJI M3D/T Battery Into Its Compartment
Gently push the DJI M3D/T battery backward into its compartment as shown. Exercise caution to avoid damaging the gasket track on the PRS-M3DTEX sleeve. The battery is fully secured in place when a light click is heard.

Step 5
Position the PRS-M3DTEX Sleeve Cable
Prior to installing the PRS-M3DTEX enclosure itself on top of the DJI M3D/T, ensure that the PRS-M3DTEX sleeve cable is positioned over top of the front left arm of the DJI M3D/T (bottom right in the image at right). Do not pull or tug the cable.

Step 6
Locate the Forward Gasket Door on the Drone
In order for the PRS-M3DTEX enclosure to be properly installed on the DJI M3D/T the forward gasket door needs to be opened and properly positioned.

Step 7
Open the Forward Gasket Door
Open the forward gasket door, and align the stem of the door with the notch in the base of the PRS-M3DTEX as shown.

Step 8
Insert PRS Into PSDK Port
Install the PRS-M3DTEX onto the DJI M3D/T. Ensure the orientation is correct, and that the PSDK USB-C connection is lined up.
*The gasket on the PSDK connection will not allow the PRS-M3DTEX to be properly seated until the mounting screws, which hold the unit down, are installed in Step 13.

Step 9
Hardware Check
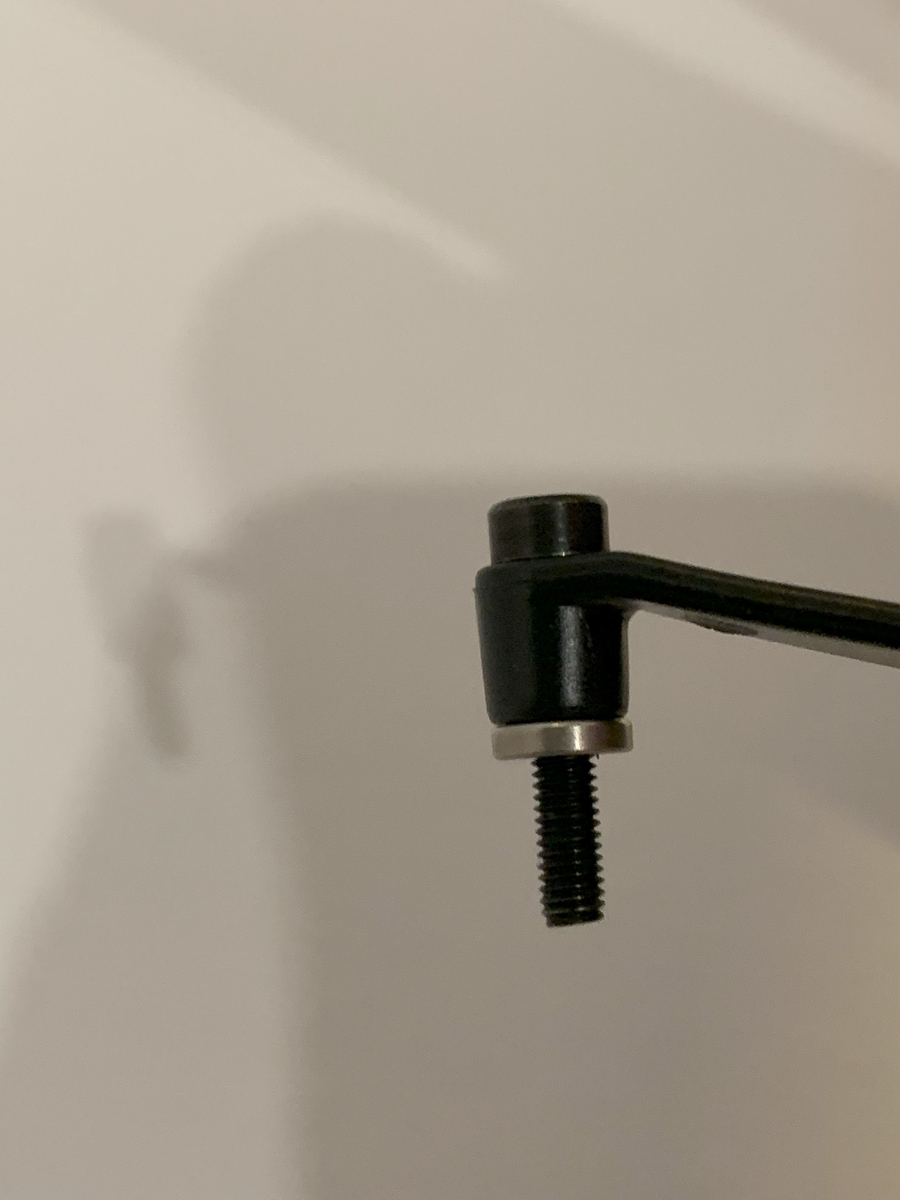
Verify that all of the included hardware is present. This includes two shorter M3x8mm (QTY2) screws for the back of the PRS-M3DTEX. and an additional strap for securing the front of the PRS-M3DTEX. The strap contains pre-installed inserts (QTY 2) and pre-installed M3x16mm (QTY 2) screws (shown at right).

Step 10
Install Rear Screws Into PRS
Install the M3 x 8 mm screws (QTY 2) through the back holes of the PRS-M3DTEX into the drone as illustrated to secure the back of the PRS-M3DTEX to the top of the drone. Ensure the screws are tightly secured.

Step 11
Double Check That Mounting Insert Is Pre-Installed Into Strap
Double-check that both the included inserts (QTY 2) and longer M3x16 screws (QTY 2) are pre-installed into the ends of the PRS-M3DTEX straps as illustrated.

Step 12
Position Straps Around Forward Arms
Loop the PRS-M3DTEX straps underneath the forward arms of the DJI M3D/T and insert the ends of the straps into the mounting holes as shown at right.

Step 13
Install Mounting Screws
Finish installing the PRS-M3DTEX using the M3x16mm (QTY2) screws to secure the front of the PRS-M3DTEX to the top of the drone. The installation holes used are located at the front/closest to the drone's camera, as shown at right. Ensure the screws are tightly secured.

Step 14
Power On Drone/PRS
To turn on the PRS-M3DTEX, you will need to turn on the DJI M3D/T drone.

Step 15
Check PSDK Connection
Check for PSDK connection and errors on the DJI M3D/T transmitter. This will be indicated by the PSDK symbol on the right-hand side of the transmitter's screen when in the camera view.

Step 16
Power Off Drone/PRS
Power off the DJI M3D/T. The PRS-M3DTEX will take up to ten (10) seconds for the LED to turn off. Once the LED is off the PRS is safe to approach. Do not unplug or move the DJI M3D/T or PRS-M3DTEX until the PRS-M3DTEX is turned off.

DURING REMOVAL, IT IS POSSIBLE THAT THE STRAP AND ASSOCIATED HARDWARE (QTY 2 PRE-INSTALLED INSERTS AND QTY 2 PRE-INSTALLED M3x16MM SCREWS) WILL BECOME STUCK IN THE MOUNTING HOLES. IF THIS OCCURS, EITHER CAREFULLY LOOSEN THE SCREWS FURTHER OR GENTLY MOVE THE STRAP FROM SIDE TO SIDE TO RELIEVE PRESSURE ON THE ENDS. DO NOT PULL EXCESSIVELY ON THE STRAP TO TRY AND FORCE IT OUT.
Last updated